I am notoriously bad at crafts. I think Pinterest is the devil because my crafts NEVER turn out the way they should, regardless of how easy someone claims the project is. As such, I have just about given up trying homemade things lately.
However, I discovered a website (The Crafty Collaborative) that features several daring women who try out various crafts and recipes and then let you know the honest scoop on how “easy” they really are! You get pros and cons from multiple ladies who are testing out the same craft so you know if it really is something worth trying! I appreciate this on so many levels!
Their most recent art project was making a homemade iron-on design using only sandpaper and crayons! This looked like a legitimate project to me and the ladies all testified that it was, so my kids and I sat down to attempt it too.
*To try this yourself, you will need the following items:
- Crayons (old crayons would work great because they will get worn down on the sandpaper)
- Sandpaper
- An Iron
- Paper Towels
- A plain t-shirt, tote bag, pillowcase, etc. that you can put a decal on
I love that the materials for this project are all things that you probably have just lying around the house! Cheap and easy? YES, PLEASE!
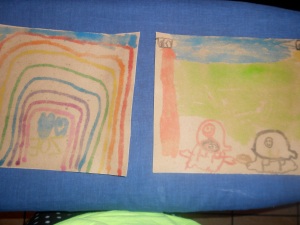
The kids sat down and colored a design on their individual sheets of sandpaper (we used the thin grit so it was easier to color on).

I forgot to take a picture of their pictures before I ironed, but you can see how well the sandpaper held on the colors even after transferring
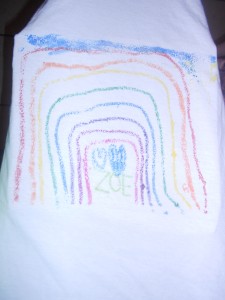
When they were finished, I flipped the paper over, lined it up on an old white t-shirt, and ironed it on. It only took about 5 seconds to get the picture on the t-shirt! Then, I put a paper towel over the t-shirt picture and ironed a few times to get the excess wax off.
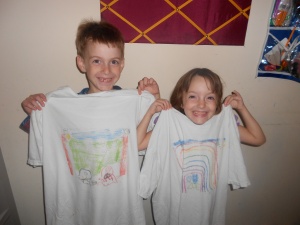
Voila; new art shirts for school (we purposely tested this out on daddy’s old t-shirts because they would be used for messy art projects anyway and I was still a little skeptical of the outcome, given my history of crafting).
You do have to push down on the crayons a little harder than usual to make sure that the picture is really bright on the sandpaper or the picture will be faint (notice that my son’s shirt is not nearly as bright in certain spots because he didn’t color as hard).
And, if you want to put any words or numbers in the picture, you have to remember to write them backwards on the paper or they will show up backwards on the shirt. My son forgot that rule and had to adjust his picture accordingly (BUT MOM, HOW DO YOU DRAW A FOOTBALL PLAYER WITHOUT THEIR NAME AND JERSEY NUMBER?! – a question that should have been asked before he started drawing seeing as though I only had 2 pieces of sandpaper at that time), which is why his looks a little wonky – he tried to turn the numbers/letters he drew into helmets on a football field, but he gets his artistic ability from his mama so it is what it is.
The whole point of my rambling is that the project was SO simple and required very little preparation, no specialty tools, little to no money, and very little work on my part – HOORAY!  It is definitely something that I would recommend trying with your kids the next time they get “bored” or if you need a cute gift for a grandparent or family member.
Thanks The Crafty Collaborative for reviewing this fun idea so that I was brave enough to try it myself!


That is so creative!
wasn’t it?! I wish I could come up with this stuff on my own! haha!
Oh wow!! That is really cool! I want to give this a whirl! I wonder how well it does in the washing machine. Probably pretty good considering someone left a crayon in their pocket a few weeks ago and it got a bunch of our clothes full of crayon in the wash and I can’t seem to get it out! Who puts crayons in their pocket????
Kids who are out to destroy us put crayons in their pockets!!! 🙂 I actually forgot to add the part about throwing it in the dryer for 20 minutes after you finish to help the crayon set into the clothes! I think that is supposed to keep it on the shirt when it comes time to wash it and not on everything else! (You may also have to wash it separately the first time to be sure, but up to you)
I’ve washed ours three times, so far so good.
Good to know!
Nice! My mom used to have kids create designs on sandpaper in art class, coloring thick like you said, putting the colors close together. Then she would bake them in a hot oven for a few seconds until the wax melted together on the sandpaper. That made a really cool art project as well!
That sounds fun too. I’ll bet it looks cool in a frame! We’ll have to try that next time they get bored (which I am hoping will not be for awhile once school starts!! That phrase “I’m so bored” is driving me nuts!!) 🙂
Thanks for the shout out! Glad the kids enjoyed this project.
You’re welcome. Thanks for sharing something that we could actually pull off!! 🙂
I’m painting furniture tomorrow for next month’s post. Wish me luck.
I have tried that before! GOOD LUCK!!!
Thank you so very much for including us! We are so excited that you gave these a shot! They turned out so great, and your kids are too cute. xo
Thanks! And thank you for being the guinea pigs on all of the projects! 🙂
This is good to know!!! There is a saying: “I have two left hands” – that is me! I am not good with hand-made things so I am grateful that you are telling us about the crafty website! 🙂
It is great that they try things out first and are honest about the difficulties if there are any! I have wasted so much time and money on things I never should have attempted! 🙂